Ham House upholstery cleaning guide for historic homes
Historic homes are wonderfully characterful, but they can be tricky to care for. Fabrics fade, fillings shift, embroidery frays, and what looks like a simple sofa clean can turn into a lesson in restraint. This Ham House upholstery cleaning guide for historic homes is here to help you make sensible, low-risk decisions when cleaning upholstered furniture in period interiors. Whether you are looking after a treasured armchair, a set of dining chairs, or a family heirloom that has seen a few generations already, the goal is the same: clean it without damaging what makes it special.
In a place like Ham House, where old timber, fine textiles, and controlled interiors all demand care, upholstery cleaning is not just about freshness. It is about preservation, timing, moisture control, and choosing the right method for the fabric. And yes, that sounds cautious. It should be. One wrong move and a water stain or dye transfer can linger for years.
Below, you will find a practical, human guide to the process, the risks, the best methods, and the little details that matter far more than people expect. If you need broader background on fabric care, you may also find the company's upholstery cleaning service useful, along with its related sofa cleaning and rug cleaning pages for nearby soft-furnishing concerns.
Table of Contents
- Why Ham House upholstery cleaning guide for historic homes Matters
- How Ham House upholstery cleaning guide for historic homes Works
- Key Benefits and Practical Advantages
- Who This Is For and When It Makes Sense
- Step-by-Step Guidance
- Expert Tips for Better Results
- Common Mistakes to Avoid
- Tools, Resources and Recommendations
- Law, Compliance, Standards, or Best Practice
- Options, Methods, or Comparison Table
- Case Study or Real-World Example
- Practical Checklist
- Conclusion
- Frequently Asked Questions
Why Ham House upholstery cleaning guide for historic homes Matters
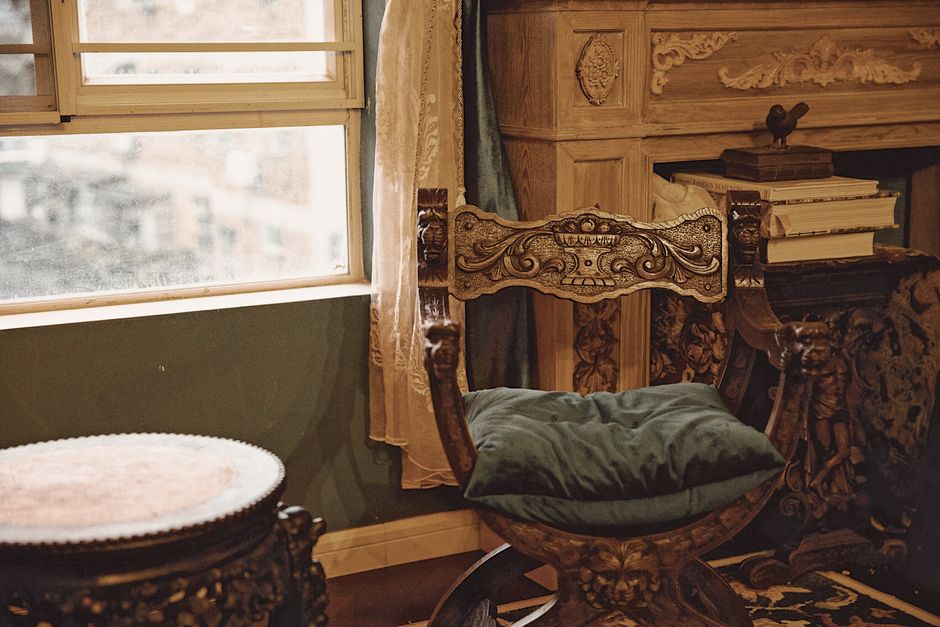
Upholstery in a historic home is not the same as upholstery in a modern flat. The fabric may be older, the stitching more fragile, the stuffing less uniform, and the piece itself may be part of the story of the room. That is why a careful approach matters so much. You are not only removing dust, body oils, and the odd spill; you are protecting materials that often react badly to heat, excess moisture, and strong detergents.
Historic homes also tend to have a mix of environmental challenges. Older rooms may feel cooler, damper, or less evenly heated than modern spaces. Those conditions can slow drying and increase the risk of odour, mould, or water marking. It sounds a bit fussy, but in practice it is just common sense. Let's face it: a damp cushion in a draughty room on a grey London afternoon is not anyone's idea of progress.
The other reason this topic matters is aesthetic continuity. Period interiors rely on texture. The sheen of aged silk, the grain of linen, the soft matte look of wool, the delicate pull of hand-finished trim - all of it contributes to the room. A harsh clean can flatten those details in seconds. Careful upholstery cleaning, done properly, helps preserve the room's atmosphere while keeping it healthy and presentable.
Expert summary: In historic homes, upholstery cleaning should be treated as preservation work first and stain removal second. The safest result is usually the one that changes the fabric least.
If you are also managing other soft furnishings in the property, it can help to think of the room as a system rather than isolated items. Curtains, rugs, sofas, and mattresses all affect dust levels and indoor freshness. For a joined-up approach, the related curtain cleaning, mattress cleaning, and carpet cleaning pages are useful reference points.
How Ham House upholstery cleaning guide for historic homes Works
The basic principle is simple: identify the fabric, assess the condition, test carefully, use the least aggressive method that will do the job, and dry the item thoroughly. The tricky bit is that every stage has judgment calls. Historic furniture is often a mix of materials, and those materials may not all tolerate the same treatment.
A proper approach usually starts with inspection. A trained cleaner or careful homeowner will look at fibre type, weave, colourfastness, old repairs, wear points, trims, and previous cleaning attempts. That last part matters more than people think. A piece that has been over-wet in the past may already have faint tide marks, weakened seams, or hidden distortion in the padding.
From there, the method is chosen. Dry soil removal may come first, followed by a very controlled spot test with a suitable solution. In some cases, a low-moisture technique is best. In others, a cautious hand-cleaning process is safer. Full wet cleaning is not automatically wrong, but in a historic setting it needs a much higher level of control than most domestic upholstery jobs.
Then comes drying and aftercare. This is where many well-meaning cleans go wrong. If a chair looks clean but still feels slightly cool or clammy, it is not finished. You want airflow, monitored drying, and enough time for the filling as well as the surface fabric to recover. Rushing it can set in smells or create uneven texture. Not ideal.
Key Benefits and Practical Advantages
Good upholstery cleaning in a historic home gives you more than a neat-looking room. The benefits are practical, preventive, and sometimes surprisingly emotional. A favourite chair feels more inviting. A drawing room feels lighter. Dust is reduced. And the furniture lasts longer because abrasive grime is no longer working its way into the fibres.
- Better preservation: Gentle cleaning removes surface dirt before it becomes embedded and harder to lift later.
- Improved appearance: Colours look truer, especially on pale textiles and lightly patterned fabrics.
- Reduced odour: Old textiles can hold smells from smoke, food, pets, or damp. Careful cleaning helps.
- Lower wear over time: Fine grit and dust act like sandpaper when people sit or move cushions.
- Better room hygiene: Historic homes collect dust in layered ways, and upholstery is often a major reservoir.
- More confident hosting: Whether you are welcoming guests or managing a property visit, the room feels looked after.
There is also a subtler benefit. Once you understand how to care for heritage fabrics, you stop delaying small issues until they become bigger ones. A tiny spill handled properly on day one is much easier than a stain that has had a month to settle in. Truth be told, that is half the battle.
For clients weighing professional help, it can be reassuring to review the company's insurance and safety information and health and safety policy before booking. Historic interiors reward that level of care.
Who This Is For and When It Makes Sense
This guide is useful for homeowners, trustees, property managers, heritage volunteers, and anyone responsible for upholstered furniture in a period setting. You do not need to be running a grand stately home for the advice to matter. A Victorian townhouse with original chairs, a Georgian sitting room with antique nursing chairs, or a smaller period property with inherited furniture all face similar risks.
It makes particular sense if any of the following apply:
- The fabric is older, handmade, or visibly delicate.
- The item has trim, braid, fringe, piping, or embroidered detail.
- The filling is uneven, sagging, or historically significant.
- You have no clear record of the fabric fibre or past cleaning methods.
- The room is humidity-sensitive or not heated consistently.
- The piece has sentimental or financial value that you do not want to gamble with.
Sometimes the best decision is not to clean aggressively at all. A light surface clean, careful vacuuming, and targeted stain treatment may be enough. Other times, a specialist upholstery clean is justified because the item is heavily used and dirt is building up. The key is matching the method to the object, not the other way around. Simple idea, but easy to ignore when a room looks tired.
Step-by-Step Guidance
1. Identify the fabric and construction
Start by looking for labels, maker notes, repair marks, or visible clues in the weave and pile. Silk, cotton, wool, velvet, linen, and synthetic blends all behave differently. If you cannot identify the material confidently, assume it is delicate until proven otherwise.
2. Check for weak points and previous damage
Inspect seams, buttons, piping, fringe, loose threads, sun-faded areas, and old patch repairs. These are the places most likely to fail if the fabric gets too wet or is brushed too hard. If the chair has been sitting by a bright window for years, the sun side may be more fragile than the shaded side.
3. Remove loose dust first
Use a soft upholstery attachment on a vacuum cleaner with light pressure. Do not drag the nozzle directly across vulnerable fabric. Work slowly and support the textile where needed. Dust removal sounds boring, but it is one of the best ways to protect historic upholstery because dry grit causes wear.
4. Test in a hidden spot
Choose a discreet area, such as the back edge, underside, or rear skirt. Apply the smallest practical amount of your chosen cleaning solution. Watch for dye transfer, texture change, or ring marks after drying. If the test area reacts badly, stop there. No heroics required.
5. Clean in controlled sections
Whether you are spot cleaning or using a more comprehensive method, work in sections and avoid soaking the fabric. Use minimal moisture, gentle agitation, and clean cloths. A little patience goes a long way here. Seriously, it does.
6. Blot, do not scrub
Blotting lifts soil and liquid without roughing up the fibres. Scrubbing can distort the pile, spread stains, and flatten decorative texture. For antique or decorative fabrics, vigorous friction is often the fast route to a slow repair bill.
7. Dry thoroughly and evenly
Open windows if conditions allow, use indirect airflow, and keep cushions separated so moisture does not get trapped. Avoid direct heat sources like radiators placed too close to the item. If the fabric dries unevenly, you may see shadowing or stiff patches.
8. Finish with a calm re-check
Once dry, inspect the fabric again in natural light. Look for tide marks, stiffness, scent, or any change in shape. If anything feels off, stop and reassess rather than repeating the clean. Repeating a bad method is, well, still a bad method.
Expert Tips for Better Results
One of the most useful habits is to think in terms of risk level. The older and rarer the fabric, the lower the intervention should be. If a stain is not actively spreading, it may be better to leave a faint mark than to create a larger patch of damage trying to erase it.
Here are a few practical tips that tend to make a real difference:
- Work from dry to wet. Loose soil should always be removed before using any liquid treatment.
- Use distilled or soft water where appropriate. Hard water can leave residue on some fabrics.
- Keep cleaning cloths pale and lint-free. It sounds obvious, yet colour transfer from cloths still happens.
- Control humidity. A room that is already damp needs extra caution and longer drying time.
- Protect surrounding surfaces. Historic furniture often sits on timber floors, original rugs, or delicate carpets. Plan the clean around the whole room.
- Document what you did. A simple note about method and date helps with future maintenance. Boring, yes. Useful, absolutely.
If upholstery cleaning is part of a broader care plan for the room, coordinating with stain removal and pet stain odour removal services can be helpful when the problem is not just age, but also everyday life. Pets, visitors, tea spills. The usual cast of characters.
Common Mistakes to Avoid
Most upholstery damage in historic homes does not come from one dramatic disaster. It comes from a series of small, overconfident choices. The fabric looked sturdy. The stain looked small. The cleaner looked harmless. And then the mark spread.
- Using too much water: This can cause dye bleed, shrinking, rings, or hidden moisture in the filling.
- Skipping a test patch: Even apparently similar fabrics can behave completely differently.
- Scrubbing stains hard: That tends to damage pile and spread contamination.
- Using strong household chemicals: Bleach, abrasive cleaners, and random "miracle" sprays are a bad fit for historic textiles.
- Ignoring drying time: A piece that feels nearly dry can still be damp beneath the surface.
- Cleaning without considering the room: If the environment is damp, dusty, or cold, the results will suffer.
- Assuming antique means untouchable: Not all old furniture should be left dirty forever. The point is careful cleaning, not neglect.
One small human thing to keep in mind: if you are unsure, pause. People often make their biggest mistakes when they feel they ought to "just finish the job." That urge is understandable. It is also where trouble sneaks in.
Tools, Resources and Recommendations
You do not need a huge toolkit, but you do need the right basics. For most historic upholstery care, the best tools are quiet, simple, and not remotely glamorous.
- Soft upholstery vacuum attachment
- White microfibre or lint-free cloths
- Soft-bristled brush for very light surface dusting
- Small bowl for controlled testing of cleaning solution
- Fans or safe airflow for drying, used indirectly
- Protective covers or clean towels for surrounding surfaces
- Notebook or care log for recording methods used
Where professional help is needed, look for clear communication, conservative methods, and proper insurance. You want a provider who explains the process plainly rather than promising miracles. If transparency matters to you, the company's pricing and quotes information and payment and security page are useful places to start.
If the room's other fabrics also need attention, it may be sensible to combine appointments with services such as curtain cleaning or steam carpet cleaning where appropriate, though historic interiors still call for a case-by-case decision. One method does not suit every item, and that is fine.
Law, Compliance, Standards, or Best Practice
Historic homes are often managed with preservation, safety, and risk reduction in mind. While this guide is not a legal document, best practice in the UK usually means balancing cleanliness with conservation. That can include careful handling of heritage materials, safe chemical use, and proper documentation of any work carried out.
For household and property settings, the practical standards to pay attention to are common-sense rather than exotic. Use products responsibly, follow manufacturer guidance where available, and avoid methods that could create slip hazards, lingering moisture, or damage to neighbouring finishes. If the building is managed as part of a heritage property, there may also be internal conservation requirements or approval processes before any significant cleaning is attempted.
Health and safety should not be treated as a side note. Historic rooms can contain fragile furniture, uneven floors, old electrical fittings, or limited ventilation. That means cleaners need to work carefully around people, pets, and the building itself. A responsible service will be comfortable discussing those issues. If that matters to you, checking the company's health and safety policy and insurance and safety information is a sensible step.
In conservation work, the usual rule is simple: intervene as little as necessary, but as much as needed. That balance is not flashy, yet it is usually the right one.
Options, Methods, or Comparison Table
Different upholstery cleaning methods suit different fabrics and levels of risk. Here is a simple comparison to help you decide what belongs where. It is not exhaustive, but it gives a practical starting point.
| Method | Best for | Pros | Risks / limits |
|---|---|---|---|
| Dry vacuuming and surface dusting | Routine care, fragile fabrics, maintenance cleaning | Low risk, quick, good for preventing soil build-up | Will not remove deep staining |
| Spot cleaning | Small spills, localised marks | Targets the problem area, uses little moisture | Can leave a visible patch if not blended well |
| Low-moisture professional cleaning | Delicate historic upholstery needing a deeper refresh | Controlled, often safer than heavy wet cleaning | Still requires testing and proper drying |
| Wet cleaning / full extraction | Sturdier modern upholstery or robust historic fabrics with approval | Can remove more embedded soil | Higher risk of shrinkage, tide marks, and damp retention |
For most historic homes, the first two options are the default, not the backup plan. A stronger method may be justified, but only after proper assessment. The right answer is not always the deepest clean. Sometimes the right answer is the most careful one.
Case Study or Real-World Example
Imagine a period sitting room with two antique armchairs, both upholstered in a faded woven fabric. One chair sits near a window and shows slight sun bleaching on the right arm; the other has a faint tea mark on the seat, probably from years of afternoon cups and conversations. The owner wants them freshened up before guests arrive later in the month.
A sensible approach would not begin with a strong shampoo. Instead, the cleaner would inspect the fabric, test for colourfastness in a hidden spot, and remove dry dust first. The tea mark would be treated with a minimal-moisture spot method, while the sun-faded chair would be cleaned only as far as its condition safely allowed. That might mean accepting a little unevenness rather than forcing both chairs to look identical.
After drying, the room would be reassessed in daylight. The result might not be showroom-perfect, and that is okay. In fact, in a historic setting, perfection can look oddly out of place. What matters is that the furniture looks cared for, the fabric remains sound, and the overall character of the room is preserved. A modest win, but a real one.
Practical Checklist
Use this checklist before any upholstery cleaning in a historic home. If more than one item feels uncertain, pause and reassess rather than pushing ahead.
- Identify the fabric type if possible.
- Check for fragile seams, trims, or loose stitching.
- Vacuum gently with a soft attachment.
- Test any solution in a hidden area.
- Confirm the item is safe to clean with moisture.
- Protect nearby woodwork, rugs, and floors.
- Work in small sections.
- Blot rather than scrub.
- Allow complete drying with good airflow.
- Recheck for marks, stiffness, or odour once dry.
- Record what was used and what happened.
Quick takeaway: if the fabric is valuable, fragile, or simply unclear, the safest choice is a restrained approach. Slow is not lazy here. Slow is smart.
Conclusion
Historic homes ask for a different kind of care. Upholstery cleaning is less about forcing results and more about preserving texture, colour, and structural integrity while making the space feel welcoming again. Done well, it can lift a room beautifully without erasing its age or character.
The main lesson is straightforward: assess first, test carefully, use the least aggressive method that works, and never rush the drying. That applies whether you are looking after one beloved armchair or a whole drawing room full of period pieces. The best outcomes are usually quiet ones, the kind you notice more because the room simply feels right.
If you are planning a broader refresh for a historic property, it helps to choose a service that understands gentle treatment, transparent communication, and proper care around delicate interiors. In the end, that respect for the fabric and the building is what keeps old homes looking dignified, not overdone.
Get a free quote today and see how much you can save.
Frequently Asked Questions
Can all historic upholstery be cleaned safely?
Not always. Some fabrics, fillings, trims, and old repairs are too fragile for wet cleaning. A careful inspection and test patch are the safest starting point. In many cases, gentle surface cleaning is enough.
What is the safest cleaning method for antique chairs?
For many antique chairs, the safest method is dry vacuuming followed by very controlled spot cleaning only where needed. Low-moisture professional cleaning may be suitable in some cases, but not every piece.
How often should upholstery in a historic home be cleaned?
It depends on use, dust levels, room conditions, and fabric type. High-use seating may need regular light maintenance, while more decorative pieces may only need occasional careful attention. Over-cleaning can be as unhelpful as neglect.
Will cleaning damage the original fabric?
It can, if the wrong method is used. That is why testing, restraint, and proper drying matter so much. The aim is always to remove soil with the least disturbance to the textile.
Can I use a household upholstery spray on period furniture?
It is usually risky. Many general sprays are too strong or too wet for historic fabrics, and they can leave residue or marks. If you are unsure, avoid them until the fabric has been assessed properly.
What should I do about old stains that will not lift?
If a stain has set deeply, the safest decision may be to reduce its appearance rather than remove it completely. Trying too hard can enlarge the mark or damage the weave. A light, targeted treatment is often the better route.
Is steam cleaning suitable for historic upholstery?
Sometimes, but only for certain sturdy fabrics and only with careful control. Steam adds heat and moisture, which can be problematic for delicate textiles, old glue, or fragile fillings. It is not a default choice.
How do I know if my upholstery is too delicate to clean myself?
If the fabric is very old, hand-finished, faded, loosely woven, or has visible repairs, assume it needs extra caution. When in doubt, get a professional assessment before trying anything beyond light vacuuming.
Why does upholstery sometimes smell worse after cleaning?
That usually means moisture remained in the fabric or filling too long, allowing trapped odours to surface. Proper ventilation and complete drying are essential. A clean finish should smell fresher, not damp.
Should I clean the whole room at once?
Not necessarily. In historic homes, it can be smarter to clean one item at a time so you can control moisture, monitor results, and avoid overwhelming the space. Small steps are often the safest steps.
How can I protect upholstery after it has been cleaned?
Keep the room well ventilated, avoid direct sunlight where possible, vacuum gently on a regular basis, and deal with new spills quickly. A little ongoing care prevents a lot of future work.
What if I need help with other fabrics in the room too?
If curtains, rugs, or carpets are also due for attention, it makes sense to look at the broader soft-furnishing picture. Coordinating care can improve the feel of the whole room and reduce repeat disruption.
That is the nice thing about historic homes: they reward patience. Keep the process calm, respect the materials, and the room tends to give that care back in quiet ways.